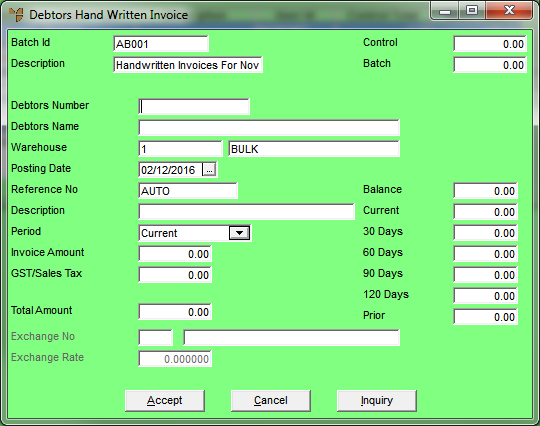
You use the Debtors Hand Written Invoice screen to enter the details of each handwritten invoice in a batch.
Micronet displays the Debtors Hand Written Invoice screen.
|
|
Field |
Value |
|---|---|---|
|
|
Batch Id |
Micronet displays the batch ID entered when the batch was created. |
|
|
Description |
Micronet displays the description of the batch. |
|
|
Control |
If a control total was entered when the batch was created, Micronet displays the amount. |
|
|
Batch |
Micronet displays the actual overall total for the batch. |
|
|
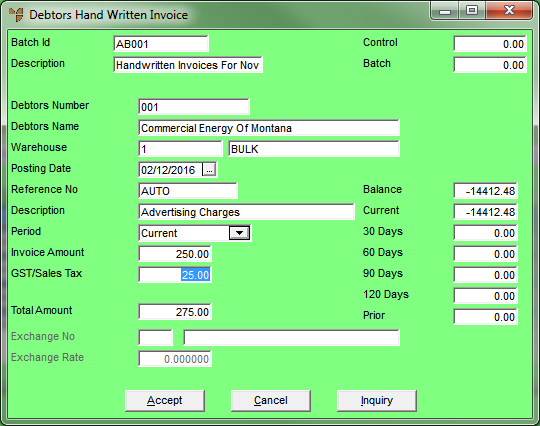
Debtors Number |
Enter the debtor ID for the handwritten invoice you are processing. You can also press Tab or Enter to select a debtor. |
|
|
Debtors Name |
Micronet displays the debtor's name. |
|
|
Warehouse |
Micronet displays the default warehouse for the debtor. You can enter or select a different warehouse if required. |
|
|
Posting Date |
Enter or select the posting date for this handwritten invoice (in DD/MM/YY format). |
|
|
Reference No |
Enter the invoice number for this handwritten invoice. If AUTO is displayed, Micronet automatically allocates the next invoice number. If you want to be able to distinguish handwritten invoices from system generated invoices, you need to overwrite the automatically allocated reference number. For example, you could enter H100021 where H = handwritten and 100021 = invoice number. |
|
|
Description |
Enter a description of this handwritten invoice. |
|
|
Period |
Select the period that this transaction should be posted to, e.g. Current or 60 Days. The invoice will be included in this period on statements for the debtor. Note that this does not change the GL period; this will still be the GL period set in MDS. It only affects the ageing on the Debtors Account Inquiry. |
|
|
Invoice Amount |
Enter the amount of this handwritten invoice, excluding GST/sales tax. |
|
|
GST/Sales Tax |
Micronet calculates and displays the GST/sales tax for this invoice. You can change this if required (e.g. if GST/sales tax does not apply). |
|
|

|
Technical Tip You should check the rounding in this field. Micronet calculates to four decimal places but this has to be rounded to two decimal places for currency. If the amount is not as expected, you should change it. |
|
|
Total Amount |
Micronet displays the total invoice amount being posted to the debtor. This is the sum of Invoice Amount + GST/Sales Tax. |
|
|
Exchange No |
If required, enter or select the ID of the exchange rate that applies to this debtor. |
|
|
Exchange Rate |
Micronet displays the current exchange rate from the Exchange Rates master file. You can change this if required. |
|
|
|
Technical Tip These two fields are only activated if the Use Multi Currency Debtors field on the Debtors Configuration screen is set to Yes (refer to "Edit - Program - Debtors"). |
|
|
Balance |
Micronet displays the debtor's total current balance, i.e. the sum of all the balances in the following fields. |
|
|
Current |
Micronet displays the debtor's account balance for the current period. |
|
|
30 Days |
Micronet displays the debtor's 30 day account balance. |
|
|
60 Days |
Micronet displays the debtor's 60 day account balance. |
|
|
90 Days |
Micronet displays the debtor's 90 day account balance. |
|
|
120 Days |
Micronet displays the debtor's 120 day account balance. |
|
|
Prior |
Micronet displays the account balance for this debtor prior to 120 days. |
Micronet displays the Debtor Inquiry screen providing you with full debtor inquiry options. For more information, refer to "Displaying the Debtor Inquiry Screen".
|
|

|
Warning Once you select the Accept button, Micronet processes and posts the handwritten invoice. You cannot delete it from the batch. |
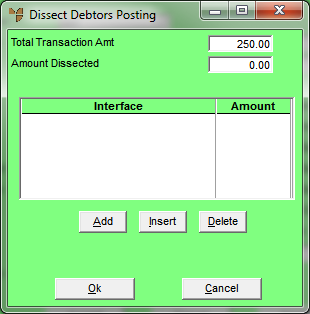
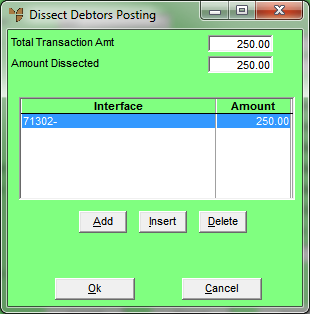
If your MDS integration with the General Ledger is setup to allow dissection, Micronet displays the Dissect Debtors Posting screen where you select the General Ledger account to which the invoice amount should be posted.
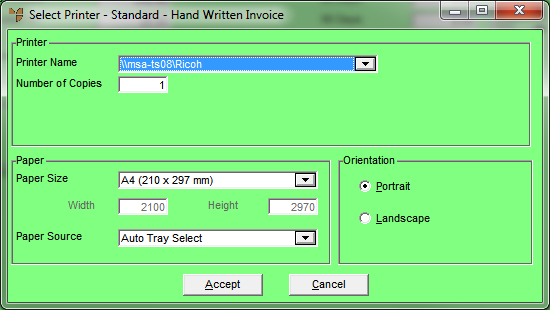
If your MDS integration with the General Ledger is not setup to allow dissection, Micronet displays the Select Printer - Standard - Hand Written Invoice screen. Go to the appropriate step below.
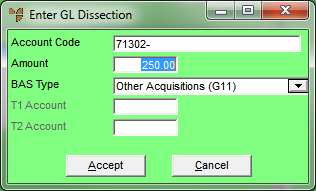
If you selected to add, insert or edit a dissection, Micronet displays the Enter GL Dissection screen.
|
|
Field |
Value |
|---|---|---|
|
|
Account Code |
Enter the GL account that this handwritten invoice amount is to be posted to. You can also press Tab or Enter to select a GL account. |
|
|
Amount |
Micronet displays the amount of the handwritten invoice. You can change the amount if different items on the invoice are to be dissected to different GL accounts. |
|
|
BAS Type |
Micronet displays the default BAS section for the GL account selected in the Account Code field. You should not change this. |
|
|
T1 Account |
If T accounts are enabled, select the T1 account for this posting. |
|
|
T2 Account |
If T accounts are enabled, select the T2 account for this posting. |
|
|
|
Technical Tip These two fields are only activated if the Use T Accounts field on the Config GL Interface (Distribution) screen is set to Yes (refer to "Edit - General Ledger Config - Distribution Interface"). |
If you have not posted the full amount of the handwritten invoice, Micronet redisplays the Enter GL Dissection screen so you can post further amounts.
When you have allocated the full amount of the handwritten invoice, Micronet redisplays the Dissect Debtors Posting screen where you can add, edit, insert or delete postings if required.
Micronet displays the Select Printer - Standard - Hand Written Invoice screen.
You can select the Cancel button if you don't want to print the handwritten invoice now, but take note of the warning below.
|
|
|
Warning You need to make sure you print all the copies of the handwritten invoice you are likely to need on this screen. While the batch remains open, you can print the invoice again using the TAX INVOICE option – see "Debtor Batch Invoices - File - Tax Invoice". However, once a batch is closed, you can't print the handwritten invoice again. Alternatively, if your default print option for handwritten invoices is set to PDF, you can save the invoice as a PDF file and reprint it as required. |
Micronet prints the handwritten invoice and redisplays the Debtors Hand Written Invoice screen.
Micronet redisplays the Debtor Batch - Invoices screen. Refer to "Managing Completed Hand Written Invoice Batches".